My name is Meera Nakrani and my candidate number is 9292. I am in group 1 with Sian Richefond (9319) and Laith Lyster (9274). To see my portfolio evidence, please click on the 3 labels on the right named A2 Research and Planning, A2 Construction and A2 Evaluation.
Our finished Music Video
My Outside Digipak Panels
My Inside Digipak Panels
Please click on the image below to view our finished website
Over this project I have learnt so much technically in both production and post-production. At the start I had very little experience with the camera kit and the editing software. The only times I had used them were in lessons and for the preliminary task. This project gave me more time to become familiar with the equipment and by the last shoot I was feeling confident with all of the kit. The newest piece of equipment was the lighting kit. The first time setting up the kit was a fun experience because it was new to all of us and we gradually became more comfortable moving, setting up and packing away all the lights.
Using the camera and framing a shot
During post-production I learnt how to use new tools on Adobe Premiere Pro that we didn't use during the preliminary task and have added to my existing knowledge. For example I learnt how to adjust key frames on the audio tracks in order to change the sound levels at certain parts in the soundtrack. Another audio tool I learnt to use was the constant gain function. This was placed between two bits of audio to make the sound transition between the two shots smoother and continuous. This prevents jumpy sound levels. I also learnt how to grade shots by changing the video effects and changing the levels and adjusting the three way colour corrector. By the end of the two weeks I have become more confident in using Adobe Premiere Pro.
Me adding a constant gain in two parts of the soundtrack
Adjusting keyframes with a close up of the keyframes
Creating titles on LiveType was fairly new to me and I would consider myself quite inexperienced. I am also new at using MacBooks. We had used LiveType once before in a lesson. It was fairly simple to use and easy to pick up. Below are some videos of me making a title and adding an effect to it. I feel that I have learnt a lot technically during the post-production stage and have found it really interesting and enjoyable to use both Adobe Premiere Pro and LiveType.
During the 1st week I was responsible for putting the shots on the timeline in the correct order with the correct timings. I also helped to fix sound levels and make the soundtrack as smooth as possible. The first week was mainly focused on getting a basic timeline sorted. This included all sound effects, idents and basic titles. I helped to position some of the basic titles during this week and made sure they were over the correct shot.
In the second week there was more to do. We had our back-up footage that needed to go on the timeline and we needed to begin grading our shots as well as making our actual titles. I graded some of the dining room shots which can be seen in the picture on the left. Below is a video of the shot before and after it had been graded.
After all of the grading was finished we began choosing fonts and effects for our titles. This was done on the MacBook on a software called LiveType. I created a few of the titles and I edited the effect on them using the keyframes on the track.
Creating a title
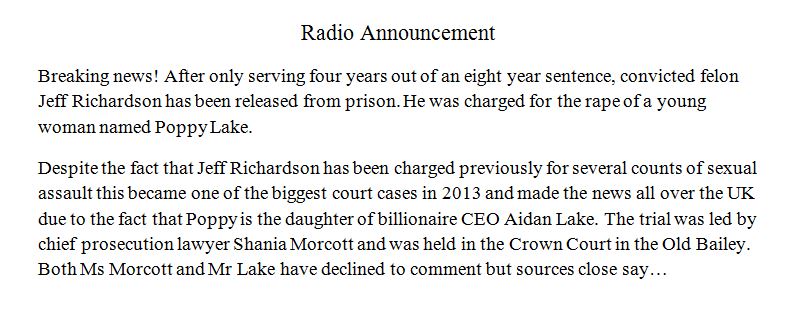
In the second week we had gotten all of our clips in the right order with the right timings and we could then start sorting out our radio announcement. I was responsible for scripting the radio announcement. It is very similar to the one in our test shoot. However as we made changes to the scenes, the timings were different and so I had to make a few changes for it to fit with the new footage. I have typed up the announcement and a copy can be seen below.
Throughout all of the shoot sessions I did a variety of jobs from filming to being on sound. Most of my time was spent directing shots and also working with our main actress Tyra. I made sure that she knew what was going on in each shot, what we wanted from each shot and tried to explain to her how we wanted the character to be feeling for each shot. I also had to cue her and Ray in for some shots. I had to be very organised during the shoot sessions and I made sure everyone knew what shot was coming up next so that we were as efficient and productive as possible.
Setting up the lights
Another one of my responsibilities was to handle one of our portable lights. This was part of our three point lighting system. I was really interested in this as I had never used a lighting kit before. As we were not allowed to keep the lights on for a long amount of time (as they heat up very quickly and can get extremely hot), I had to sit by one of the lights and switch it on when it was needed and off when we were done.
Me directing a shot
I enjoyed all aspects of the shooting process, in particular filming shots. I feel that I was more suited to the directing side of things as I liked to make sure that everyone was ready and that we were focused and organised. I also enjoyed communicating our views and ideas to Tyra and bringing each scene together.
During our second week of editing we focused on grading, titles, video FX and any small finishing touches. Below is a copy of our Edit week 2 schedule.
2nd Editing Week Schedule
Our opening sequence was kept fairly simple and so we didn't need to use any video FX. Instead we focused on the process of grading our shots. Grading is the process which changes the aesthetic of the footage by making sure that all the shots are within the chosen colour scheme of the film. We chose to have a naturalistic look to our shots, with a slightly greyish-blue look. Grading was very important for us as the inside of Sian's house, once all the lights were on, is quite bright with a slight orange tint which is noticeable on the wooden table and cupboards.
Before (left) and after (right) - effects of grading
The effects we placed on the shot to grade it
We also needed to create our titles and credits. For this we used the MacBook and a software called LiveType. We took inspiration from the films 'Se7en' and 'Shutter Island' when we chose our fonts and effects. To represent the thriller genre, in a similar way to 'Se7en', we chose to use an effect which makes the words shake which hopefully creates an unsettling feeling. For our title we chose a different font to the rest of our credits and also a different effect. The font for our title is similar to that of 'Shutter Island'. The effect is also less jarring and instead smoother and slightly mysterious. Below is a video showing our title with its effect.
Our back-up shoot took place on the 5th March 2017. We began at 9:00am as usual and had finished by around 2:30pm as there was less footage to shoot. Below are screenshots of our back up shootboard.
Page 1
Page 2
Page 3
Unfortunately it was raining in the morning so we had to adapt our plans slightly and work around the weather. We decided we would film the outdoor sequence with the additional prop of an umbrella so that we could continue to film through the rain. Luckily for us the rain stopped and the weather improved massively and so we could film the shots as planned with out the umbrella. During the filming of the outdoor sequences we made sure to keep an eye on the distance between the jogger and the lawyer so it was more realistic. Additionally we had more time to practice the hand held jogging shot so that it would be as steady as possible. This time round Sian filmed the hand held jogger shot as she has the steadiest hand. We also added a small amount of dialogue as the lawyer was to be on the phone as she walked down the street. In her first shot she says "Yeah I'm alright, I just can't believe he's been released though" and in the other shot she says "It's alright, it's just a jogger." This helps to make the fact that she can't hear the jogger behind her more believable. Below is a clip showing the two shots that contained dialogue.
The other thing we changed was the dining room sequence. As the lawyer sits down, she receives a text from her friend asking if she is ok as the man she put in prison (Jeff Richardson - the stalker) has been released. In the shot after that you see her sign a few more documents to represent the fact that she works in the legal profession.
Below is a video of the dining room rushes from our main shoot and also the ones from our back-up shoot.
Overall I am extremely happy with the footage we took during our back-up session and I think that we were successful in our improvements. I believe that our red herring sequence will be more effective now and that on the whole our narrative is now clearer too.
Our first week of editing consisted on going through all of the raw footage, renaming the takes, and putting the shots onto the timeline in the basic order. No grading or title making took place this week as the main focus was to see whether a back up shoot would be required after looking through our opening sequence with the footage we had. Below is our Edit week 1 schedule.
1st Editing Week Schedule
As a group we had decided to do a back up shoot as there were both small issues for example the lighting kit can be seen in a shot and the fact that the lawyer locked her door but didn't have keys. Also there was a lipstick stain on the character's glass despite the fact that she doesn't drink the water.
Lighting kit is seen on left hand side
Lipstick mark is sen on the glass
There were also a few narrative issues. By including our shot of both the lawyers heels and the jogger's trainers we gave away the fact that he is a jogger and so we lost our element of suspense and tension. This was also an issue with the over the shoulder shots we took. After trying our different versions of the shot we decided that the best one was the point of view shot as it is similar to the stalker shot which helps to create mystery and tension. However we only had one take of this shot and it was extremely shaky. Therefore we need to do a backup shoot to get more takes of this shot and also to make a few adjustments to the end sequence to fit the point of view shots better. Additionally when looking through the footage we realised that the distances between the lawyer and the jogger were inaccurate. The jogger is moving faster than the lawyer but the distance between the two characters never decreased. We plan to change this as well in the back up shoot and pay attention to the distances so that the matches between shots are accurate.
Group editing session
Another change we decided to make was to have the laywer on her phone as she is walking to make it more realistic as to why she couldn't hear the jogger. This is in response to a text she received in the kitchen scenes. The text will read "Heard he has been released. You ok? I will call you soon." This will hopefully make the link between the lawyer, the stalker and the radio announcement clearer. For our back up shoot we are planning to redo the kitchen scenes and the outdoor scenes as our bedroom sequence was exactly how we intended it to be.
Our post-production kit is what we used to edit our footage and what we used to create our credits. The hardware consists of:
A computer with two monitors
Headphones
A MacBook
The software consisted of:
Adobe Premiere Pro
LiveType
We used the computer and Adobe Premiere Pro for majority of the editing process and only used the MacBook and LiveType to create our titles and credits as the software has a wide range of fonts and effects we could choose from, helping to make our credits looks as professional as possible.